Showing posts with label sounds. Show all posts

Sunday, April 24, 2011

How to Use the Sound Spelling Cards (Grades K – 5)


Greetings,

I hope you had a great Easter Holiday.  Today I will be sharing with you how to use the Open Court Sound Spelling Cards.  When I was a Second grade teacher, we would practice the sound spelling cards two - three times a day.  The purpose of the sound spelling cards includes the following:

* Teaches children how to sound out words to read

* Teaches children how to spell words and to recognize spelling patterns

* Teaches children to recognize words in print

* Teaches children to speech sounds to combine with other words

* Teaches children the relationships between the letters of written language and the individual sounds of spoken language

* Teaches children to read words isolated and in connected text

* Teaches children to correctly remember the sound and meaning in their mind when reading

* Teaches letter sounds and simple patterns to remember through letter introduction

It is very important for the teacher to display the cards and model the use of the sound spelling cards.  Cards can easily be referenced by children in the classroom as a reference.  The children should be able to easily see all the sound spelling cards. 

There is also a sound spelling card chant and song we used when reviewing the cards.  Click here to download it.  When using the chant and song, make sure your children are standing and facing the cards.

Once you have the spelling chant memorized then you can add the actions that make the cards come alive.  To view these movements click here to download it.  I hope you enjoyed these wonderful resources on the Open Court sound spelling cards.  I will see you next week with another exciting topic.

Update August 2011: For those of you who have found my Sound Spelling Cards Blog, I have a YouTube channel with 72 Instructional videos, including 10 blending videos to help you and your students.  To check out the blending videos, simply click here or play the video below.


Here is a training video on the Open Court Reading Sound Spelling Cards.
readmore »»  

Sunday, February 28, 2010

How to Create a Podcast or Vodcast Part 2 of 3

Hello,
Today I will be covering the following steps:

3. Installing Audio Software to Record Your Podcast
4. Using Audio Software to Record Your Podcast

So, let's get started with installing the audio software.

3. Installing Audio Software to Record Your Podcast: You want to use the best possible free software to edit and prepare your podcast. The one I recommend is Audacity. It's free and a very good sound editor. It can be found by clicking on the picture above. Once you go to the site you want to download Audacity 1.2.6 Once you get to the site you will want to choose Audacity 1.2.6 installer and if the download does not begin, choose the option direct link Save the file to your desktop. When you are using the software in Audacity you will need to convert your sound files to an Mp3 and you will need to download the LAME encoder by going to LAME Mp3 Encoder Once you visit the site, you will need to choose the operating system you are using, then click on the LAME download page Toward the bottom of the page you will see the following picture. Click on the appropriate link on the site, and save it to your desktop. Next, you will go to your desktop and double click on the icon and it will ask you to run it, click run and follow the instructions. You will want to remember where you saved it, usually it will be in your Program files menu. Next, double click on the audacity icon on your desktop and you will see the following:

Open Audacity and click on Edit -> Preferences -> File Formats Now this is what you will see. Click on Find Library and follow the instructions. (Here is where you want to find the LAME Mp3 Encoder file, remember it is under Program Files)

4. Using Audio Software to Record Your Podcast: Once you have your software and the Lame Mp3 encoder is installed you are ready to test your microphone. You can either use a headset with a microphone or you can use a microphone and your computer speakers. Plug in your microphone or headset. The microphone is usually the red jack and the headphones is usually the black jack. Go to Start -> Control Panel and double click on Sounds and Audio Devices. Next, click on the Voice tab and click the Test Hardware button. Follow the instructions to test your microphone. For additional tips on settings to make your recordings great visit the following site Great Tips on Recording When you are in Audacity make sure "Microphone" is selected as the recording source in the drop-down menu on the mixer toolbar.

Go to Edit -> Preferences -> On the Audio I/O tab make sure your sound card is selected as the device for playback and recording. In the Channels drop-down box under Recording, choose 1 (Mono). You can use stereo if you want but it will make your file larger and you want to try and keep it as small as possible. Under the Quality tab make sure you choose 44,100Hz as the Default Sample Rate and 16-bit as the Default Sample Format. Under the File Formats tab make sure you choose WAV (Microsoft 16 bit PCM) as the Uncompressed Export Format.

Now you are ready to record. Check on the microphone Meter toolbar in Audacity and you should see a red level indicator moving when you start recording. You can talk into the microphone and make adjustments to the volume until it looks like the picture below.


Now, your almost ready to record. Down below in the picture you will see the featured buttons to start your recording.


Simply push the Record button and you can start talking. When your done recording press the yellow square button to Stop the recording. If you want to edit your file, where you want to cut out parts of your recording or delete parts. You simply edit out parts by clicking and dragging to highlight the part you want to remove. Select Edit and choose either Cut or Delete. The part you want to edit will turn a grey shaded color. If you want to keep only one section of a recording, highlight that section and select Trim from the Edit menu. Take a look at the picture down below and you will see how to edit your clip.

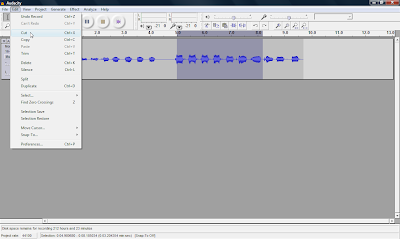
You can also record many multiple tracks to add to your podcast, which is one of the many features you can't do with movie maker 2.
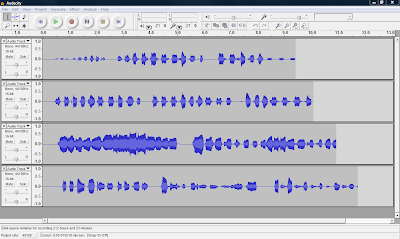
Ok, next week I will be talking abou the final steps in your podcast, step 5. Turning your Podcast into a Vodcast and step 6. Publishing and Promoting. I will also be covering how to add music to your podcast and how to convert your WAV file to an MP3 so you can post online. See you next week.
readmore »»